General Interface
Overview
This section will detail the various common interfaces used to access LiveForms.
Log In
The login page is likely the first menu to greet a user accessing DBS LiveForms. It also appears when a user has become inactive for an extended period of time.
Users with LiveForms or LDAP accounts sign in with a username and password. If users continuously try to log in with the wrong password, the login will be locked. This lockout is system-wide (not currently configurable per-domain): after 5 failed attempts the account is locked for 3 minutes before another attempt is allowed. Accounts using Entra may log in with the Continue with Microsoft button. If LiveForms has multiple domains using Entra, then the next screen presents a dropdown to choose which domain to log in with.
Note
Admins may configure a default domain, in which case the button will automatically try to sign the user into that default. A dropdown option will appear on the Continue with Microsoft in order to log into other domains.
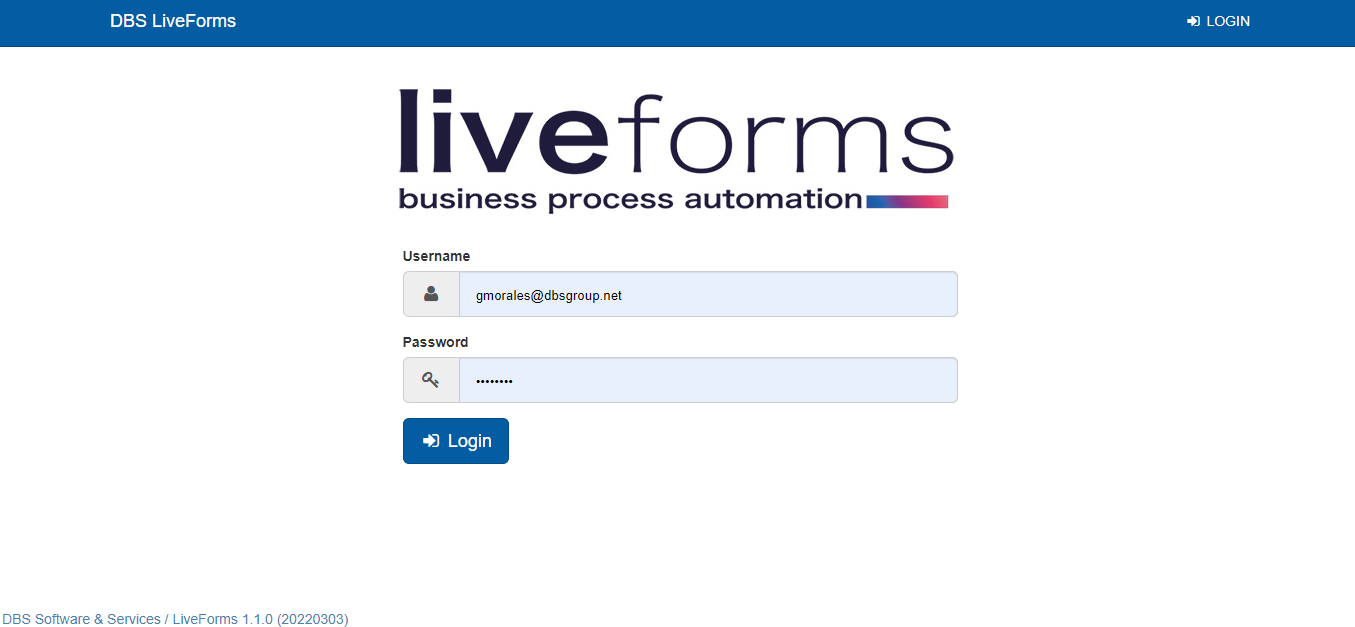
If the user has two-factor authentication enabled on their account, they will be asked to enter a code. Otherwise, they will be sent to the home page.
Two-Factor Authentication
Two-Factor Authentication only happens if it is enabled in a user’s profile. After a typical login, the user will then be asked to enter a code sent to their email or generated by the Google Authenticator app, depending on which method they chose. See Account for how to set this up.

Once the user enters the correct code, they can continue to the Home menu.
Forgot Your Password
If a user has forgotten their password, they can click the Forgot your password? link on the login page. This will take them to a page where they can enter their username in the format “username@domain”.
The next page will ask how the user would like to receive a code to reset their password. Then the user will be asked to answer their security questions. On answering the questions correctly, the user will be sent a code to reset their password.
Danger
If the user doesn’t have an authenticator app, SMS email, or email for their profile, they will not be able to reset their password. An admin will need to reset the password for them.
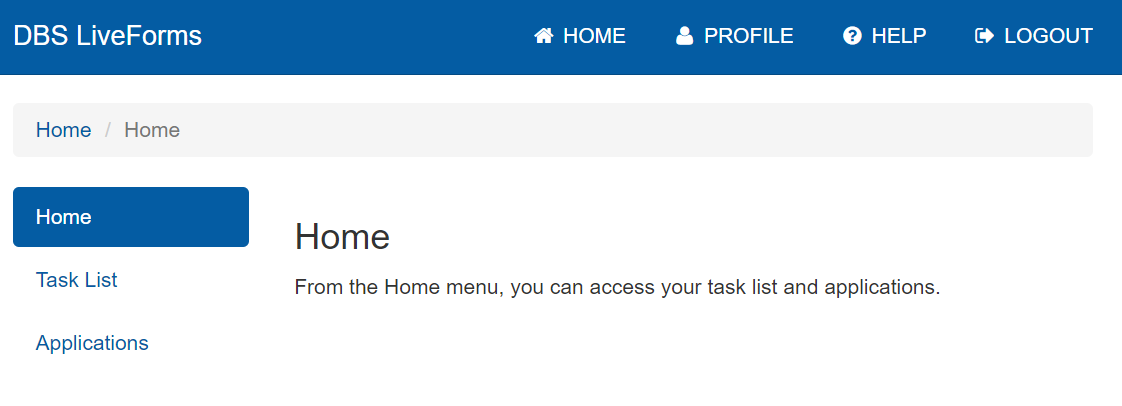
Home
The home screen welcomes users after they log in. It’s the hub where users can navigate to the different features of LiveForms. The menu on the left of the page allows access to the main interfaces for LiveForms.
Tasks assigned to this user will appear in the task list, while users with the designer role will be able to access the Applications, Form Templates, and Data Sources.
Additionally, the home screen has a graph giving the user an idea of how many tasks they can access. This shows which tasks are escalated, near due, past due, and other available tasks. Hovering the mouse over a section shows the exact number of tasks. Any task that has been escalated, is due within 7 days, or is past due is considered urgent. A focused view of urgent tasks can be accessed by clicking the banner above the graph.
At top of the page, there is a navbar with a selection of options.
 Home: This brings the user back to this page.
 Manage: Available only to admin users, allows them to create and edit other users. See Users for a guide on configuring users.
 Search: Lets users search for any content they have access to.
 Help: Brings the user to a support request page and provides a link to this documentation.
 Language: Allows the user to change system text to a different language. Does not affect user created content.
 Account: Users may edit their account information here.
Search
This feature searches for user created content throughout the current domain. The search matches based on individual words and is not case-sensitive.
For submissions, using asterisk can help search for things you may not know the full text for. As an example, searching “j*” will bring up submissions containing Jon or jsmith.
For finding content like flows and forms, search will match parts of words. As an example, searching “fin” can get results with “Financial” and “Final”. Additionally, adding words to descriptions can help make them searchable.
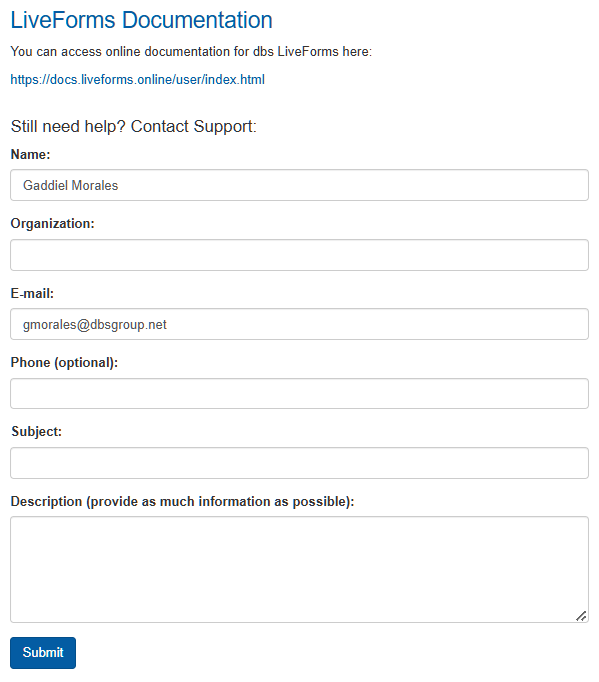
Help
The help page allows you to access this documentation. It also has a form which a user can fill out in order to get support from one of our representatives.
Language
This dropdown lets users switch between different translations for the system. User content such as form field names and submission values do not get translated.
Note
System admins may add more translations by adding translation files.
Account
The account button allows users to either log out of LiveForms or configure their settings. See Account for a guide on user settings.
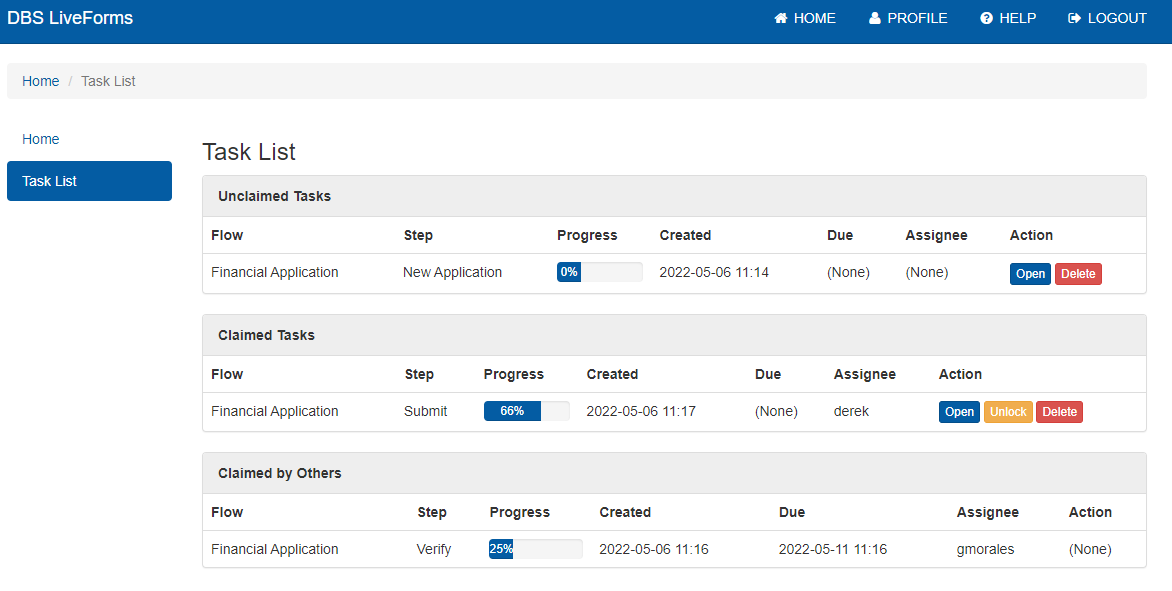
Task List
The task list is where users will complete workflow items assigned to them. It is split into unclaimed task, claimed tasks, and tasks claimed by others. Each task lists the flow the task is part of, the step of the task in that flow, a progress bar, the creation date, the due date when applicable, and who has claimed the task.
Each column of the task list showing task info can be used to sort items in ascending or descending order.
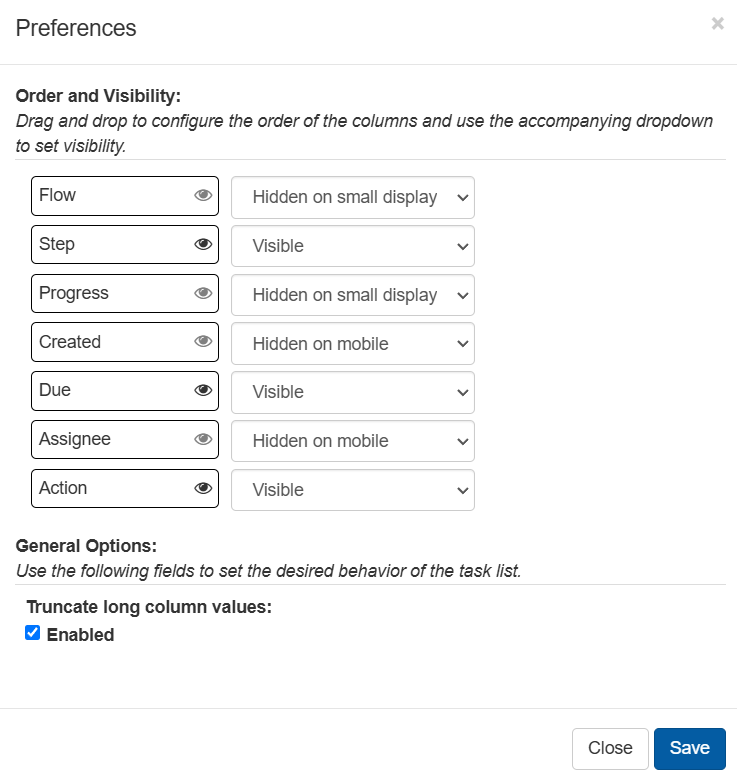
Users can also choose which columns get displayed on what screen sizes and in what order by clicking the  preferences button.
To re-order columns, drag the names on the left. Columns will be displayed in order from top to bottom.
By default, long column values will be truncated, which is to say that the value will end in “…” in order to fit the column.
Uncheck Truncate long column values to disable this.
preferences button.
To re-order columns, drag the names on the left. Columns will be displayed in order from top to bottom.
By default, long column values will be truncated, which is to say that the value will end in “…” in order to fit the column.
Uncheck Truncate long column values to disable this.
The search feature filters the task list based on the information visible on the task screen, such as the flow name, progress amount, and more. In the flow options, designers can add classifiers which add field values to the task list. This is where the Applicant and Loan name come from in the task list screenshot. The Show Urgent button filters the task list to only show task that have been escalated, or due within a week, or are past due.
Task Actions
Tasks have four actions:
 Open: Claims the task for the current user and opens the flow step.
 Unlock: Removes a user’s claim on a task.
 Delete: Removes the task from the system.
 History: Shows a list of who accessed the flow, at which step it was accessed, and at what time range a user had claimed the task.
Warning
Task deletion can not be undone.
Task Organization
Tasks are organized into three categories. Unclaimed Tasks are tasks that are assigned to a user or group but have not been opened yet. Once a user opens a task it becomes Claimed. Only the user with the claim can open that task. Unlocking the task removes the claim and sends the task back to the unclaimed list. Users can also see tasks Claimed by Others. Admin users have the ability to unlock these tasks so that they may be reassigned.