Flow Management
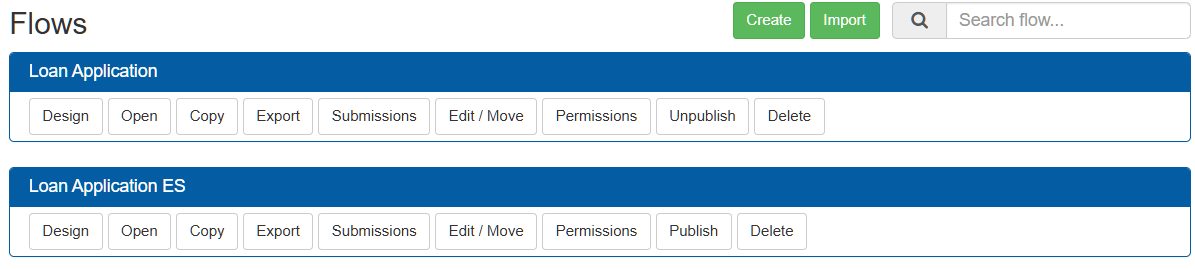
The Flows page will list all Flows that exist within the Application you selected. You may also navigate to the forms of the same application by clicking Switch to Forms. Flows can be filtered using the search bar. Each Flow will be listed on its own line with the following options: Design, Open, Copy, Export, Submissions, Edit/Move, and Delete.
The forms list can be filtered by using the search bar. Any form name or description that has text matching the search bar will be shown.
Creating
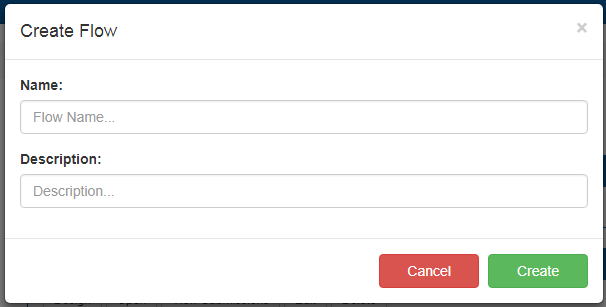
To create a new Flow, click the Create button in the upper right corner of the Flows list.
This will display a pop-up where you can enter the Name and Description for the Flow you wish to create. Clicking the Cancel button will cancel the process and return you to the Flows list, while clicking the Create button here will create a new Flow with the specified Name and Description.
Import and Export
Flows can be exported by clicking the Export button. This will download a zip file, which can then be imported using the Import button at the top of the Flows menu. This can be useful for creating backups or when moving flows to different LiveForms domains.
Editing Properties
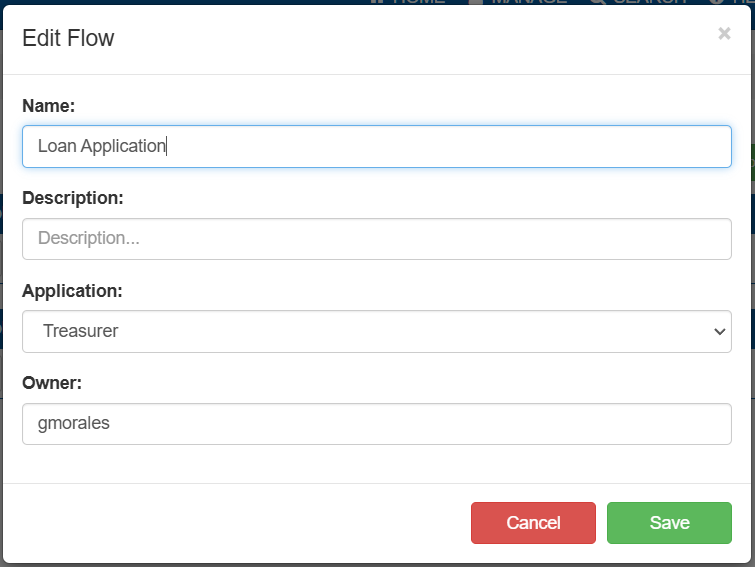
Clicking the Edit button will display a pop-up with the Flow’s information. Here you may change the Name, Description, Application, and the Owner. Clicking the Cancel button will cancel the process and return you to the Flows list, while clicking the Save button here will save the fields.
Deleting
Warning
Please use caution when choosing to delete a Flow, as this action can NOT be reversed.
Clicking the Delete button will display a pop-up asking you to confirm whether you wish to delete the Flow or not. Confirming this action will delete the Flow as well as any submission data associated with it.
Publish
The Publish button makes the flow available for other users to start tasks.
Additionally, this toggles a flag in the LiveForms database entry associated to the flow to be either false (0) or true (1).
Clicking Publish sets the flag to true and clicking Unpublish sets the flag false.
If using LiveForms with another website, you can query the database in order to see which flows are deployed and enable links based on the results.
Below is an example SQL query which would return all deployed flows. Replace the liveforms with the schema name your LiveForms uses:
SELECT * FROM liveforms.app_flow WHERE deployed = 1;
Permissions
Clicking on the Permission button brings an interface for defining who has what specific rights over a specific flow.
Note
Users must have the admin domain role or the manage permission for the application in order to reach this menu.
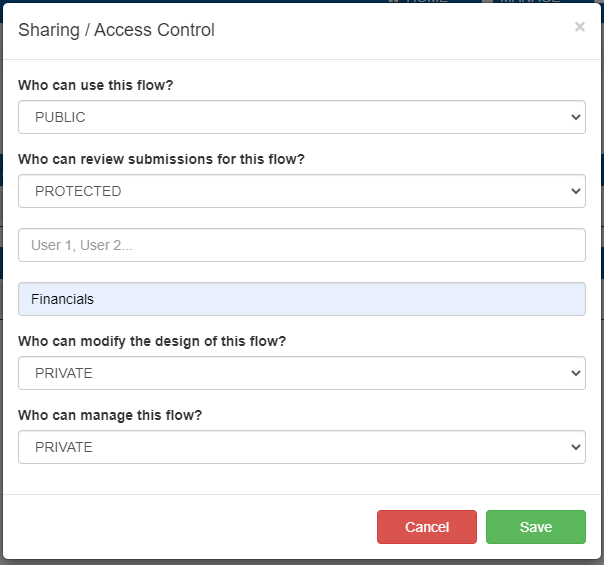
There are three levels of security for each feature:
Public: Anyone may utilize the feature.
Protected: Usage of the feature is restricted to the specified users or roles.
Private: Usage of the feature is restricted to domain admins, application managers, and the original creator.
For protected permissions, existing user and group names in the system will be suggested as you type.
The following features can be configured individually:
Who can use this flow?: This right is needed to open a flow.
Who can review submissions for this flow?: This allows access to the submissions of a flow.
Who can modify the design of this flow?: Allows designing, opening, copying, exporting, and deploying the flow.
Note
A user must have usage permissions at the application level before they can get permissions at the flow level.