Entra Management
Entra domains use entra ID to authenticate users. This allows users to log in using their Microsoft account. LiveForms cannot modify or create users or roles in entra, and they must be configured from Microsoft Azure.
Entra Configuration
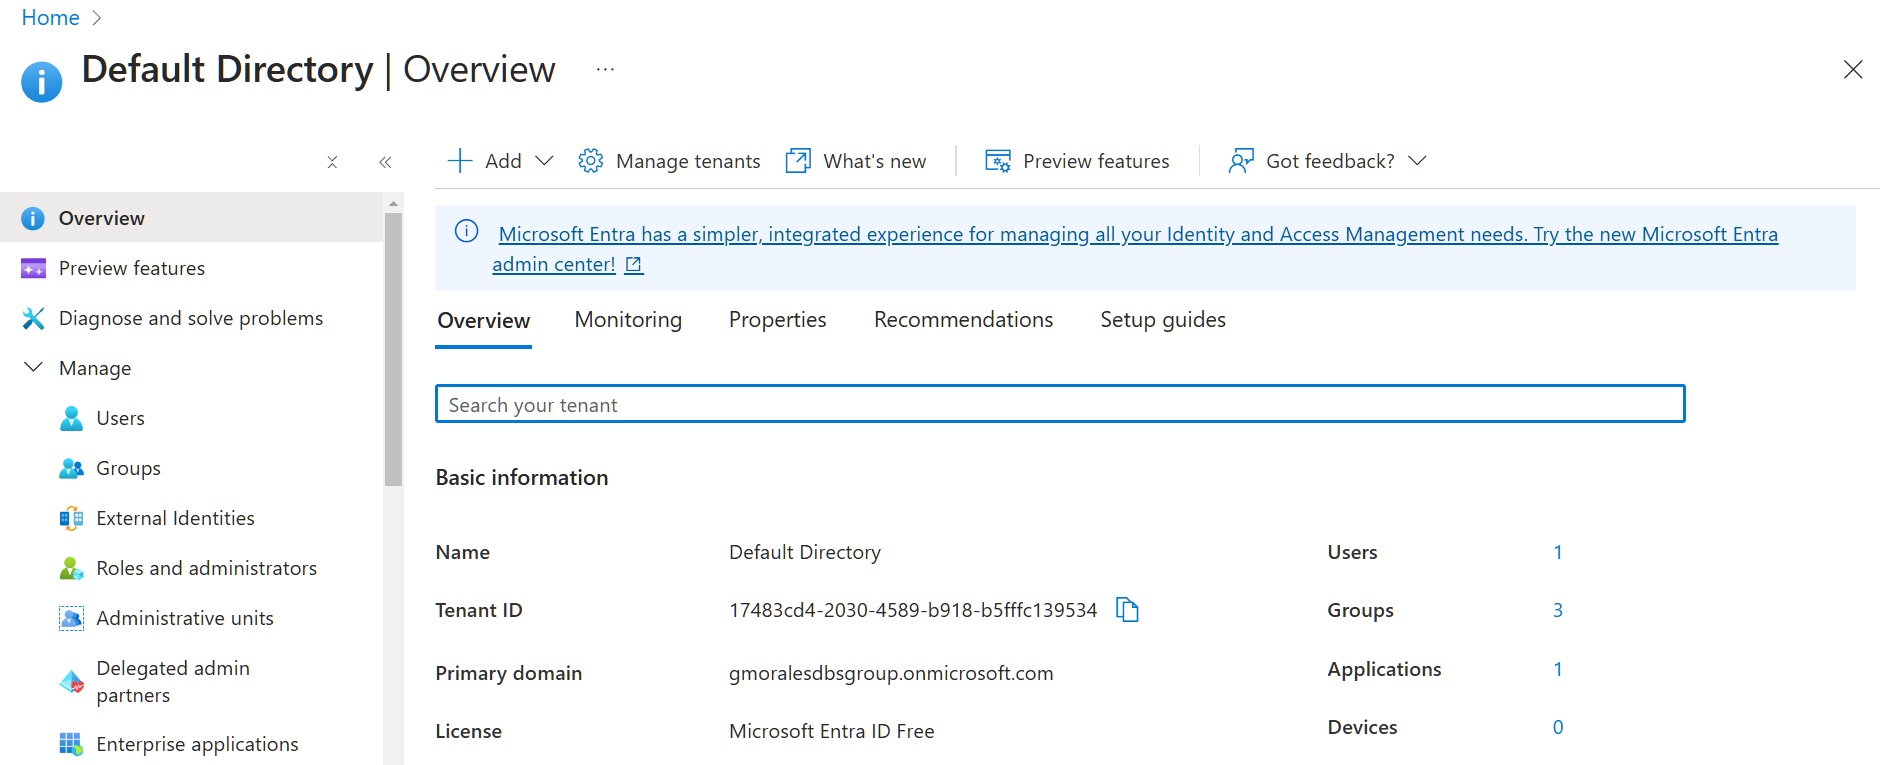
In order for LiveForms to use Entra ID, an Azure application must be registered under your Entra ID directory. Your Overview menu should display the Tenant ID and Primary Domain which will be used to configure LiveForms.
Register an Application
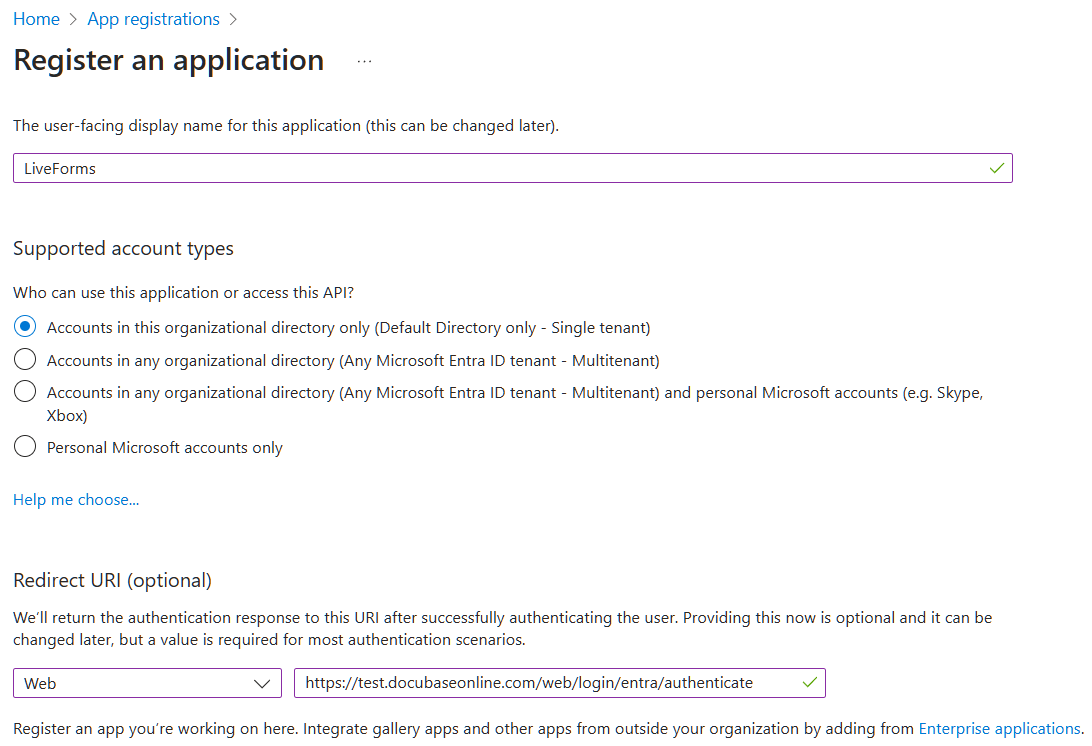
LiveForms requires an Application to be registered under your domain. The application provides credentials for authentication.
To make a new application, click New registration above the application list.
Enter an identifiable name of your choice, and select the account type option that best fits your organization.
Finally choose the Web platform in the dropdown and enter the Redirect URI to liveforms.
The URL will be similar to the following {liveforms}/web/login/entra/authenticate.
Replace {liveforms} with your liveforms base url. This URL must be publicly available for Entra to send authentication information back to LiveForms.
Click Register to save this application.
Tenant ID
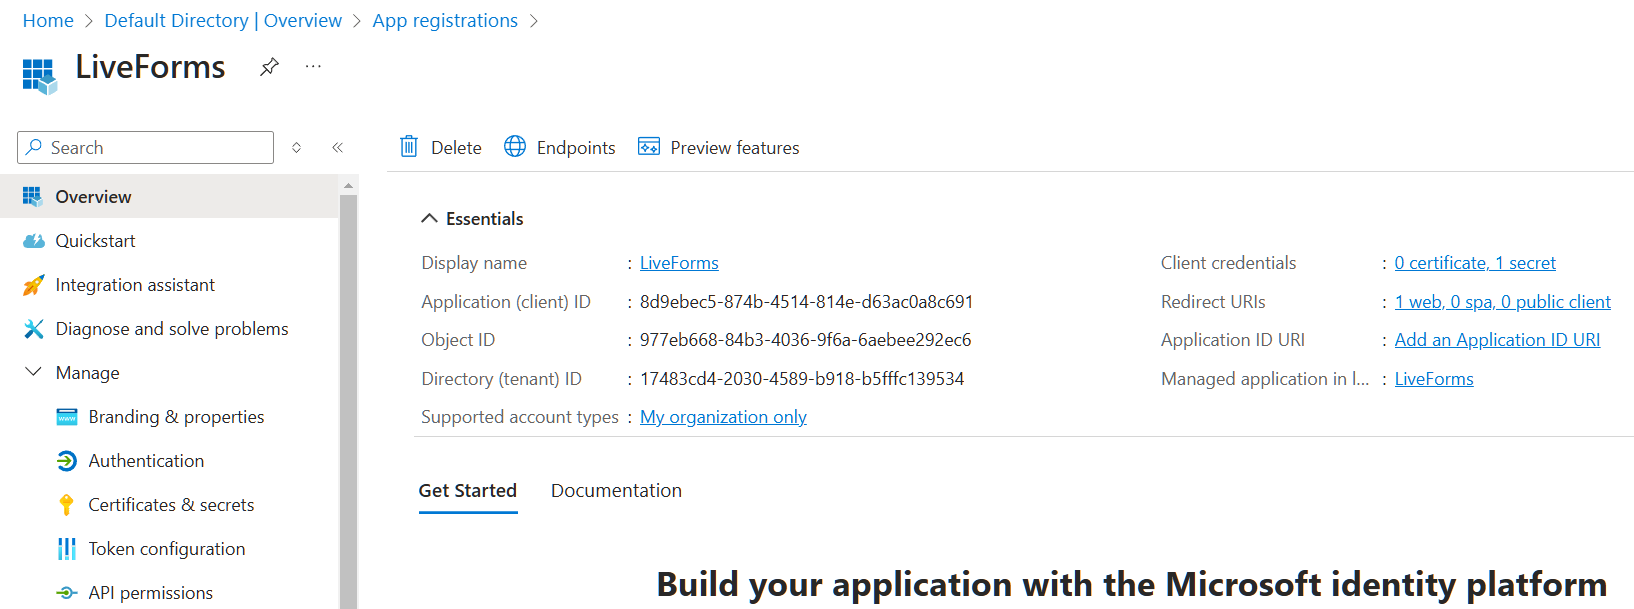
After registering the application you can click on its name to go to the application overview. This screen shows the Directory (Tenant) ID which will be used in the Tenant ID field in LiveForms. This screen also leads to the Secrets and API Permissions menus which will be used in the next sections.
Add Permissions
LiveForms’ application will need more permissions in Azure in order to get your groups and users. In the Manage side bar there is an API Permissions tab. On the menu that opens, you will need to add Application and Delegated permissions for Microsoft Graph called User.Read.All and Group.Read.All. Click Grant admin consent for Default Directory to confirm the permission.

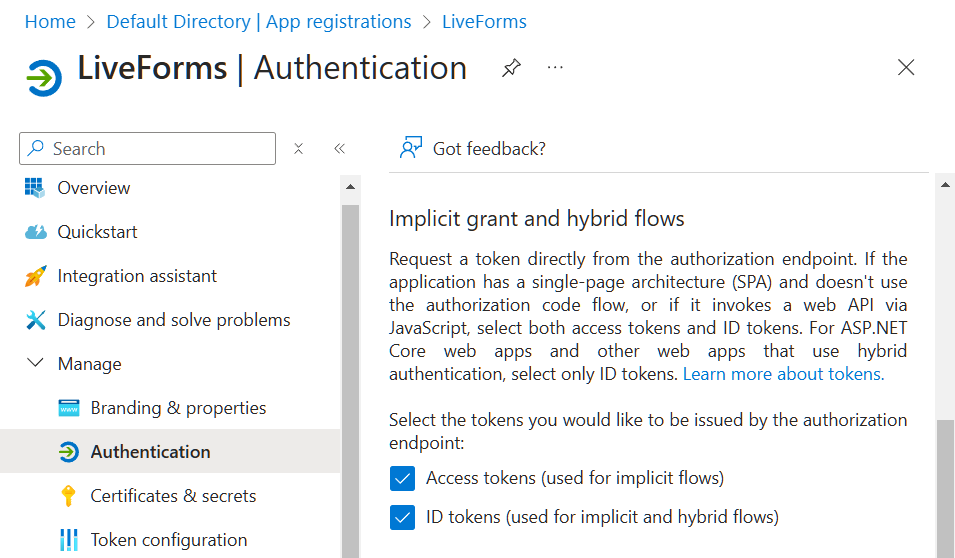
Authentication
Navigate to the authentication page for the application. You will need to check the options for access tokens and ID tokens under the section titled Implicit grant and hybrid flows.
Additionally, enable public client flow.

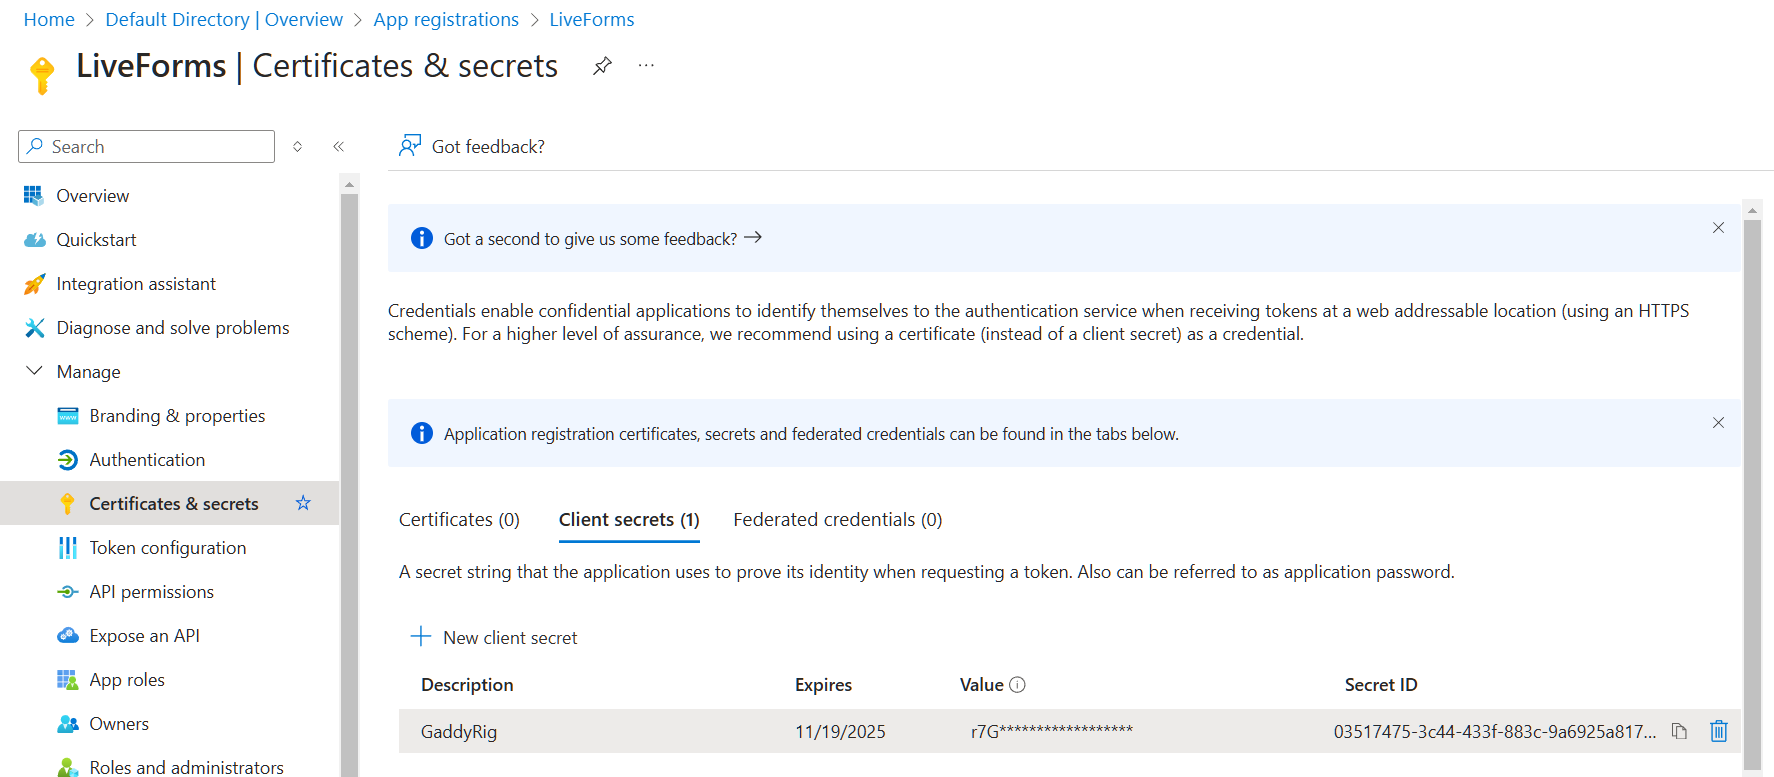
Create a Secret
To create a secure connection with Azure, you are required to generate a Secret for the application. Navigate to the application’s overview in Azure, then the menu for Certificates & Secrets. Click on the New Client Secret button and fill in a description and expiration date of your choice. The secret value will appear in your list, and should be copied and placed into the Secret Value field of your LiveForms domain.
Note
The secret is only visible the first time you generate it. It’s recommended that you save it somewhere secure.
LiveForms Configuration
Connecting to Entra
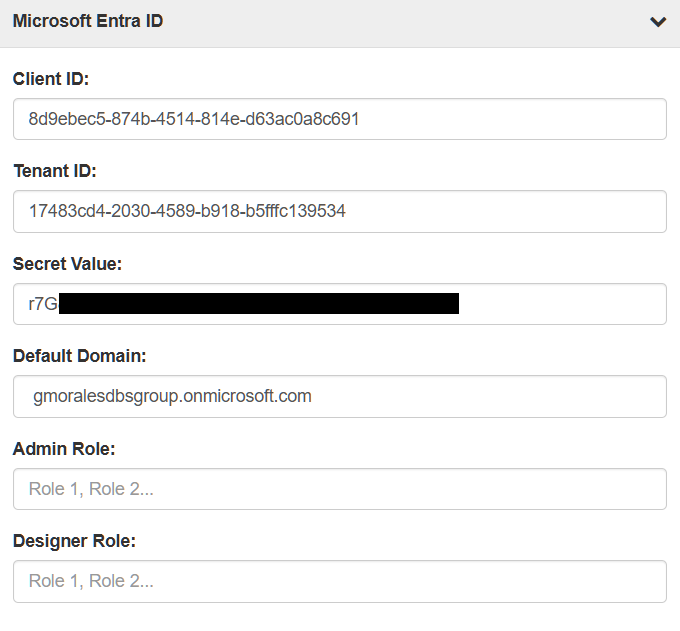
In the LiveForms domain settings page, a Microsoft Entra ID section will appear. The following values are required to connect:
Client ID: This is ID of the user with administration rights over the application, users, and groups.
Tenant ID: This ID comes from the registered application in Entra.
Secret Value: This is a private code that is generated in the secrets security and certificates section for the registered Azure application.
Default Domain: This is the “Primary Domain” listed in the Microsoft Entra ID overview page.
With these fields configured successfully, all roles and users under that Entra domain should now be visible in the LiveForms domain.
Additionally, a new checkbox will appear in the general domain settings called Enable Resource Intensive Features. Enabling this allows LiveForms to give auto-complete suggestions for user and role fields. Given the size of some Entra directories, this may have a noticeable impact on performance and latency.
Role Permissions
To allow Entra groups to use LiveForms, add the group names to the Role (Group) Filters field. The role names can use wildcards to select multiple groups at once, and using commas allows multiple names to be entered. To give groups admin and designer permissions, enter the respective group names into the Admin Role and Designer Role fields. Multiple groups can be given permissions by entering them as a comma separated list, as seen in the field’s sample text.
User Log In
With Entra fully configured, users may log in using the Continue with Microsoft button. For a system with multiple Entra enabled domains, a new page may pop up with a dropdown for the user to make a selection.
A LiveForms admin can designate a specific domain as the default. In this case, a domain selection dropdown will be available on the right side of the button. Clicking the button will attempt to instantly log in to the default domain.
Note
User log-in requires that the Redirect URI is configured correctly in Entra. Ensure the URL given to Entra’s configuration is publicly available for when Entra returns with the user’s information.